


That is exactly the problem the Gemini API was built to help solve. Google's generative AI platform processed 85 billion requests in January 2026 alone, a number that goes well with just how many developers and businesses are already offloading heavy cognitive work to it. Writing, summarizing, restructuring content - Gemini handles it at scale, without the blank-page paralysis.
What most WordPress users don't know is that connecting Gemini directly to their site - so it drafts, formats and publishes blog posts automatically - is well within reach. You don't need to be an experienced developer to make it work. You need the right setup, a workflow and an understanding of how the two systems talk to each other.
I'll walk you through that. You will learn how to authenticate with the Gemini API, pass prompts that produce publish-ready content and push that content into WordPress programmatically via the REST API. By the end, you'll have a working pipeline that turns a topic idea into a live blog post with minimal manual effort.
Short Summary
To use Gemini API with WordPress for automated blog publishing, obtain a Gemini API key from Google AI Studio, then connect it to WordPress using a plugin like WPGetAPI or custom PHP code. Send prompts to Gemini's endpoint to generate content, then use the WordPress REST API or WP-Cron to automatically publish posts. You can schedule content generation, set categories, tags, and post status programmatically. Always review AI-generated content before publishing and follow Google's usage policies to maintain content quality and compliance.
What the Gemini API Actually Does for Content Automation
The Gemini API is Google's way of giving developers direct access to its large language models. Instead of a chat interface, you send text prompts to the API and get generated content back as a response. That response can be a full blog post, a product description, a set of headings, or anything text-based.
For WordPress users, this matters because it turns content generation into something you can trigger automatically. You are not copying text out of a chat window and pasting it into your editor. The API connects directly to your site's backend so content can be created and published without you in the middle of every step.
The kinds of tasks Gemini works well with include writing first drafts, generating meta descriptions, summarizing source material, and making structured content like FAQs or listicles. It follows instructions closely, so if you give it a prompt with tone input and a word count, the output tends to match that pretty accurately.

To connect Gemini to a WordPress site, you'll use the Google Gen AI SDK, a library that handles communication between your code and Google's servers. It takes care of authentication, request formatting, and response parsing so you don't have to build that from scratch.
The integration itself is not a long project. A basic working setup - where a PHP or Python script sends a prompt and posts the result to WordPress via the REST API - can take around 15 to 20 minutes to get ready. That low barrier is part of why this has attracted attention from site owners who want to scale content without hiring more writers.
Think of the API as a text engine you can plug into any part of your workflow. You could trigger it on a schedule to publish posts automatically, fire it off when a new product is added to your store, or use it to generate supporting content around a topic you are already writing about manually.
What you get out of it depends almost entirely on what you put in. The prompt design and the logic around how content gets published are yours to control. The API handles the language generation part.
Choosing Between Gemini Models and Pricing Tiers
Google gives you more than one model to work with, and the one you pick will optimize your output quality and your monthly costs. For most WordPress automation setups, the choice can depend on two models: Gemini 2.5 Flash and Gemini 2.5 Pro.
Gemini 2.5 Flash is built for speed and volume. At $0.30 per million input tokens, it's a good choice for generating large batches of drafts, product descriptions, or short posts where you need throughput over depth. If your workflow means publishing frequently and editing afterward, Flash is a helpful starting point.
Gemini 2.5 Pro sits at $1.25 per million input tokens and $10.00 per million output tokens. That cost difference is real. But Pro handles long-form content with noticeably more nuance and coherence. For cornerstone articles or content that goes out with minimal editing, the extra spend can be worth it.
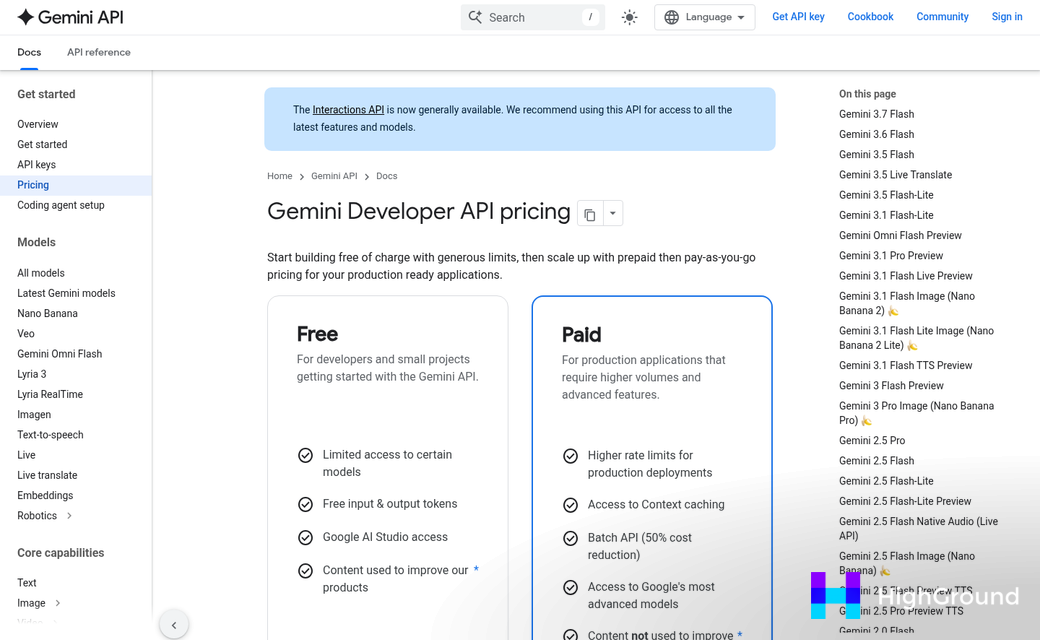
| Model | Best For | Input Cost | Output Cost |
|---|---|---|---|
| Gemini 2.5 Flash | High-volume, fast drafts | $0.30/million tokens | Varies |
| Gemini 2.5 Pro | Long-form, detailed content | $1.25/million tokens | $10.00/million tokens |
The Gemini API includes 5,000 free Google Search grounding prompts per month - this lets the model pull in real-time web data to support its responses, which is helpful if you want your automated posts to reference latest events or recent information instead of older training data alone.
Consider your publishing volume when choosing a model. Running a few hundred posts a month through Flash will cost you a fraction of what Pro would, and that gap widens fast at scale. If you're automating a low volume of high-stakes content, Pro's deeper output is probably the better allocation of budget.
You can also combine models depending on content type. Use Flash to generate supporting content like FAQs or category descriptions, then route your main editorial posts through Pro. That split lets you control costs without sacrificing quality where it matters most to your readers.
Setting Up Your Gemini API Key and WordPress Connection
Head to Google AI Studio and sign in with your Google account. From the left sidebar, click "Get API key" and then "Create API key." You can tie it to an existing Google Cloud project or let AI Studio create a new one. Copy your API key and store it somewhere safe - you'll only see it once.
Before you connect anything to WordPress, you need the Google Gen AI SDK. If you are working in Python, install it with pip install google-generativeai and then set your API key as an environment variable with export GOOGLE_API_KEY=your_key_here - this keeps your API key out of your code, which is best practice.
Three Ways to Connect Gemini to WordPress
The right connection strategy can depend on your comfort level with code. Here is a quick overview of the three main paths.
Option 1: A WordPress plugin. Plugins like "AI Engine" or "Bertha AI" let you connect a Gemini-compatible API key through a settings panel. No coding needed - the fastest way to get started if you want to generate content manually inside the WordPress editor.
Option 2: Custom PHP. You can write a PHP script that calls the Gemini API and then uses the WordPress REST API to create posts automatically. Your script sends a POST request to /wp-json/wp/v2/posts with your generated content and an authentication header - this gives you full control but does take some PHP knowledge to set up correctly.
Option 3: n8n as a workflow tool. n8n is a no-code automation platform where you can build a workflow that calls Gemini, formats the output, and publishes it to WordPress - all on a schedule. You can set it to run every day at 7 AM and produce 800 to 1,000 word posts that are already structured for SEO. n8n has native HTTP request nodes that manage the API calls without any custom code.
Pitfalls to Watch For
Two things like to break the connection. The first is missing API permissions - check that your Google Cloud project has the Generative Language API" enabled under the APIs and Services dashboard. The second is an incorrect endpoint URL, so double-check that the base URL matches the model version you picked in the previous step.
Once a test request comes back with a valid response, your connection is working and you are ready to feed it data.
Feeding Gemini Fresh Data Using NewsAPI
Gemini writes better posts when it has something to work with. Generic prompts like "write a blog post about AI trends" produce generic output. When you feed it a headline and a short post summary, it has context to build from and the result feels far more grounded. If you're comparing how different models handle this kind of input, the breakdown in Claude vs ChatGPT vs Gemini for blog writing is worth a look.
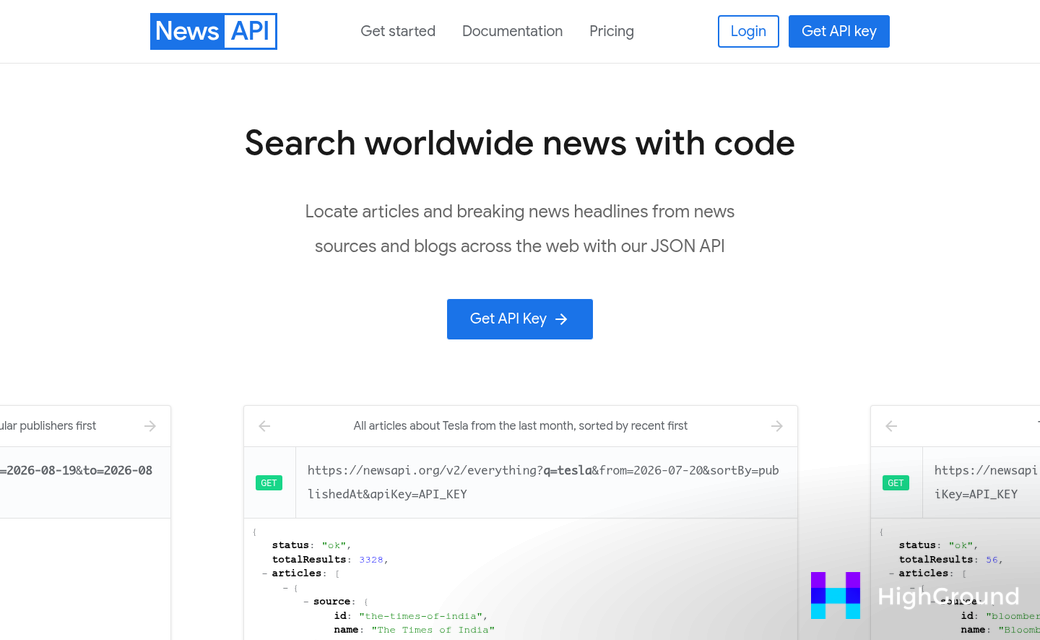
That's where NewsAPI comes in - it gives you access to live headlines from thousands of sources and has a free tier that allows 1,000 requests per day; it's plenty to run a publishing schedule without paying anything to start.
How to Pull Headlines From NewsAPI
To get started, sign up at newsapi.org and grab your API key. From there, you can make an easy GET request to pull the top headlines in any category or keyword you want to target. Here's a basic PHP example to fetch headlines related to a topic your blog covers.
$response = wp_remote_get('https://newsapi.org/v2/top-headlines?q=artificial+intelligence&apiKey=YOUR_KEY');

$body = json_decode(wp_remote_retrieve_body($response), true);

$headline = $body['articles'][0]['title'];

$summary = $body['articles'][0]['description'];
This gives you a headline and a short description to pass along to Gemini. You can loop through multiple articles if you want to generate a few posts in one run.
What to Pass to Gemini and What to Leave Out
Avoid passing raw news data straight into your prompt. Unfiltered post text can include weird formatting, incomplete sentences, or content that steers Gemini in the wrong direction. Extract just the helpful pieces - the headline, the description, and maybe a keyword or two - and build a clean prompt around those. Using AI to generate post outlines first is one way to keep that structure tight before you write.
A short, well-shaped input produces a better post than a long, messy one. Think of it as giving Gemini a creative brief instead of a pile of raw notes.
It also helps to filter out articles with empty descriptions before passing anything to the API. A quick conditional check in PHP keeps your prompts steady and stops Gemini from working with half-formed information.
Fresh data keeps your content timely and gives Gemini something to anchor its writing to. Posts built around current events or latest discussions feel more relevant than ones written in a vacuum. The next step is shaping your prompt so Gemini knows what post to write from that input.
Structuring Prompts So Gemini Writes Posts Worth Publishing
The quality of what Gemini produces depends almost entirely on what you ask for. A vague prompt gets you a vague post - generic sentences, no structure, and nothing that fits your site's voice. Constraints are not the enemy here; they're what turn a mediocre draft into something you'd actually publish.
Start by thinking about what your ideal post looks like. How long is it? What tone does it use? Does it have an intro, a few H2 sections, and a conclusion? If you can't describe your target post in a sentence or two, write that description down before writing the prompt.
A well-built prompt tells Gemini the format, the word count, the tone, and the SEO angle all at once. Here's a structure you can adapt:
Begin with the role. Tell Gemini it's writing as a knowledgeable blog author for a specific type of audience. Then give it the topic and any keywords to work into the post. Follow that with formatting instructions - ask for an H1 title, two or three H2 subheadings, and a meta description at the end. Close with the word count and tone. Something like "Write in a friendly but informative tone, around 600 words" is enough to keep the output on track. You can save these as reusable templates by editing your pipeline prompts directly.

| Prompt Element | Example Instruction |
|---|---|
| Role | "You are a blog writer for a personal finance site." |
| Topic + Keywords | "Write about mortgage rate changes. Include the keyword 'fixed-rate mortgage'." |
| Format | "Use one H1 title, two H2 subheadings, and short paragraphs." |
| Meta Description | "Add a 155-character meta description at the end." |
| Tone + Length | "Friendly and informative, around 600 words." |
You can also pass in your NewsAPI data as part of the prompt context. Tell Gemini to base the post on that data and to reference it throughout - this keeps the content grounded in information instead of generalities. For more on adding Gemini to your WordPress workflow, there's a full setup guide worth reading alongside this.
One thing worth testing is how much the meta description instruction changes the output. When you ask for it explicitly, Gemini tends to write a tighter introduction too - it seems to make the whole response more focused. Fine-tuning these details is also covered in the post writing preferences settings if you want defaults that apply across every run.
If your first few posts still feel off, the fix is usually in the prompt. Add one more constraint and run it again. Prompt engineering techniques are well documented and can help you understand why small wording changes produce noticeably different results.
Keeping Your Automated Blog Working Without Breaking It
If this is all quite a bit to manage at once, start smaller than you'll have to. Even one automated post per week is a genuine win. It proves the system works, gives you something concrete to evaluate, and builds your confidence to increase the volume. Automation should cut back on your workload - not create a new one - so scale at a pace that stays comfortable.
The most important mindset to carry forward is that this pipeline is a tool you control - not a machine that runs on its own. The prompts you write, the sources you choose, and the editorial standards you set determine the quality of every post it produces. Experiment, iterate, and don't be afraid to change what isn't working. The setup you have doesn't have to be the setup you keep forever. That flexibility is what makes it worth building.
FAQs
What is the Gemini API used for in WordPress?
The Gemini API connects Google's AI language model to your WordPress site, enabling automated content generation and publishing. It can write blog posts, generate meta descriptions, and create structured content like FAQs without requiring manual input for every step.
Which Gemini model should I use for blog automation?
Gemini 2.5 Flash suits high-volume, fast draft generation at a lower cost. Gemini 2.5 Pro is better for long-form, detailed content that requires minimal editing. You can combine both models based on content type to balance quality and cost.
Do I need coding skills to connect Gemini to WordPress?
Not necessarily. You can use plugins like AI Engine for a no-code setup, or use n8n, a no-code automation platform, to build workflows connecting Gemini to WordPress without writing custom code.
How does NewsAPI improve Gemini-generated blog content?
NewsAPI supplies live headlines and article summaries that give Gemini real context to write from. This produces more timely, grounded posts compared to generic prompts, and the free tier allows up to 1,000 requests per day.
How do I write better prompts for automated WordPress posts?
Include a defined role, target keywords, formatting instructions, desired tone, and word count in every prompt. Clear constraints help Gemini produce structured, publish-ready content rather than vague, generic output.